Tuesday, July 18, 2023

Using ASUnit Testing Framework


Introduction to ASUnit and AppleScript

In today's blog, I wanted to share my experience using ASUnit to write unit tests for AppleScript. I had written my own unit test library and that worked well enough, but I wanted to explore other options that could provide a more comprehensive and standardized approach to testing AppleScript code.

Setting Up ASUnit for AppleScript

To set up, I followed the following steps, which are available in the README.md of the ASUnit project.

  1. Clone the project: git clone https://github.com/lifepillar/ASUnit
  2. Run the following commands in your terminal:
  • cd ASUnit
  • osacompile -o ASUnit.scptd -x ASUnit.applescript
  • mkdir -p ~/Library/'Script Libraries'/com.lifepillar
  • mv ASUnit.scptd ~/Library/Script\ Libraries/com.lifepillar

Setting Up Templates (Optional)

There are files you may want to make available in your template files so that you can add ASUnit codes easily via the context menu in Script Editor.

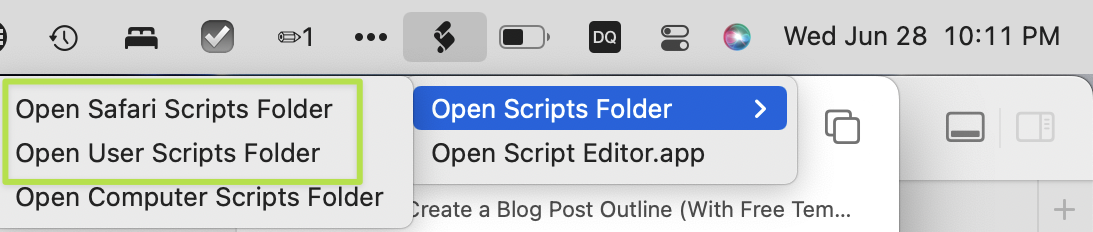
  1. Navigate to your templates folder in `/Library/Scripts/Script Editor Scripts` and create a new folder. I called mine ASUnit. Remember that this will be the parent menu when you trigger the context menu in Script Editor.
  2. Create new templates for each of the sample unit files in the templates folder of the ASUnit project. Don't worry if you need to learn how to do this; drop me a comment, and I can write about it if you're interested to learn about that. 

Test Folder Structure

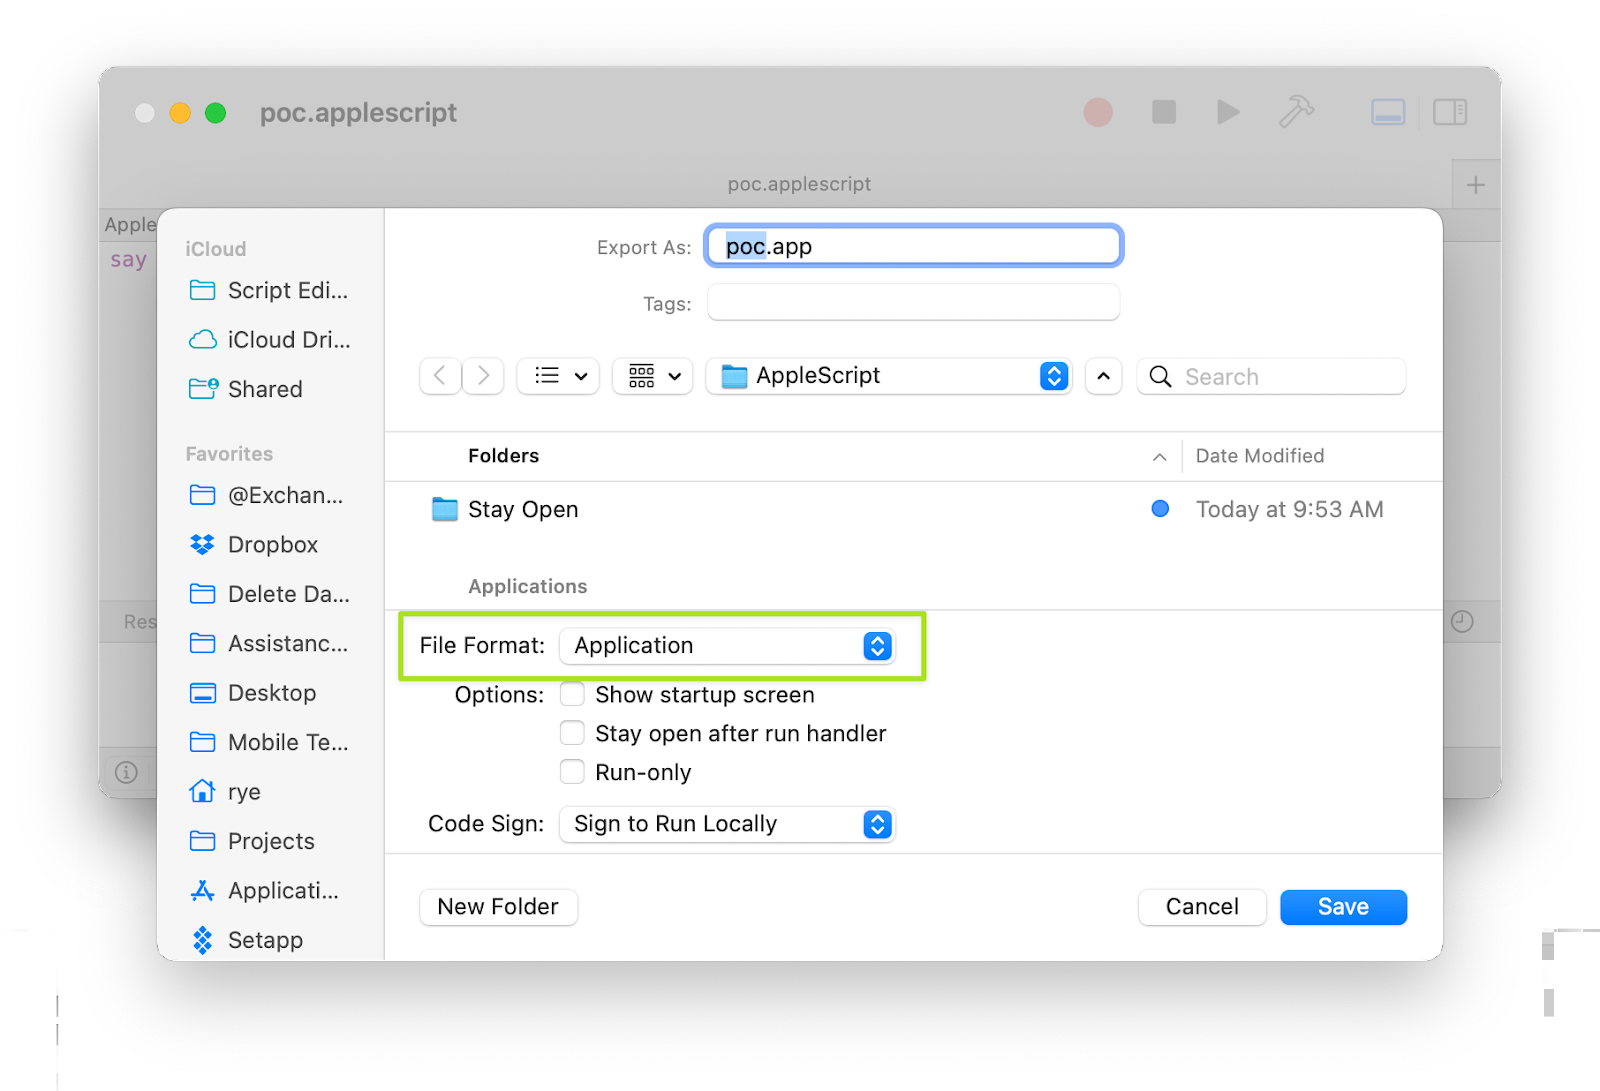
Once you are set up, you'll have to decide how to structure your scripts and your tests. I have test files mirrored under the test directory at the root of my project. Another difference is that my scripts are saved as .applescript instead of .scpt. That is because I've thought of .scpt as the compiled version of the script, and I wanted to keep the text version for version control purposes. To write your first unit test with ASUnit, you can start by copying the file Test Template.applescript from the templates folder and renaming it. I named mine as plutilTest.applescript, basically, it's the library name with the "Test" suffix. Once I figured out how to set up the object to test, I added the execution and the assertions. It is useful to have the README.md open to serve as a reference to the different assertions available.

Initial Code Changes

  • Make sure the script's run handler is compliant with ASUnit; that is, it had to return a reference to the script instance. I had to make small changes here because I've used run handler to run some spot checks during development.

plutil.applescript


(* Used by ASUnit to access this script. *)

on run

tell application "System Events"

if name of (path to me) is "plutil.applescript" then

my spotCheck()

return

end if

end tell

me

end run

  • Make sure the script can be compiled into .scpt if it still needs to be an.scpt file. In my case, I simply need to run a build command so that my script to test was compiled to .scpt in the Script Libraries folder. This can be easily accomplished by running a generic command that would run a shell command like: osacompile -o ~/Library/Script\ Libraries/plutil.scpt plutil.applescript
  • Update the global and script properties accordingly

---------------------------------------------------------------------------------------

property suitename : "The test suite description goes here"

property scriptName : "plutil" -- The name of the script to be tested

property plist : "~/applescript-core/test-plutil.plist"

global sutScript -- The variable holding the script to be tested

---------------------------------------------------------------------------------------

  • Update the first test case called "|Loading the script|" and make sure you can make that test pass by updating the reference to the location of the test script and the script to test.

script |Load script|

property parent : TestSet(me)

script |Loading the script|

property parent : UnitTest(me)

try

tell application "Finder"

set deploymentPath to ((path to library folder from user domainas text) & "Script Libraries:"

end tell

set sutScript to load script (deploymentPath & scriptName & ".scpt") as alias

end try

assertInstanceOf(scriptsutScript)

end script

end script

  • Once all these items were addressed, I went on ahead and migrated my existing test to ASUnit.

script |plutil tests set|

property parent : TestSet(me)

property sut : missing value

on setUp()

set sutLib to sutScript's new()

set sut to sutLib's new("test-plutil")

end setUp

on tearDown()

try

do shell script "plutil -remove 'key-root' " & plist

end try

end tearDown

script |Delete String Key|

property parent : UnitTest(me)

do shell script "plutil -replace 'test-string' -string 'some value' " & plist

ok(sut's deleteKey("test-string"))

try

set shellResult to do shell script "plutil -extract 'test-string' raw " & plist

fail()

end try

end script

end script

After migrating some of the tests, I am quite pleased with the result.


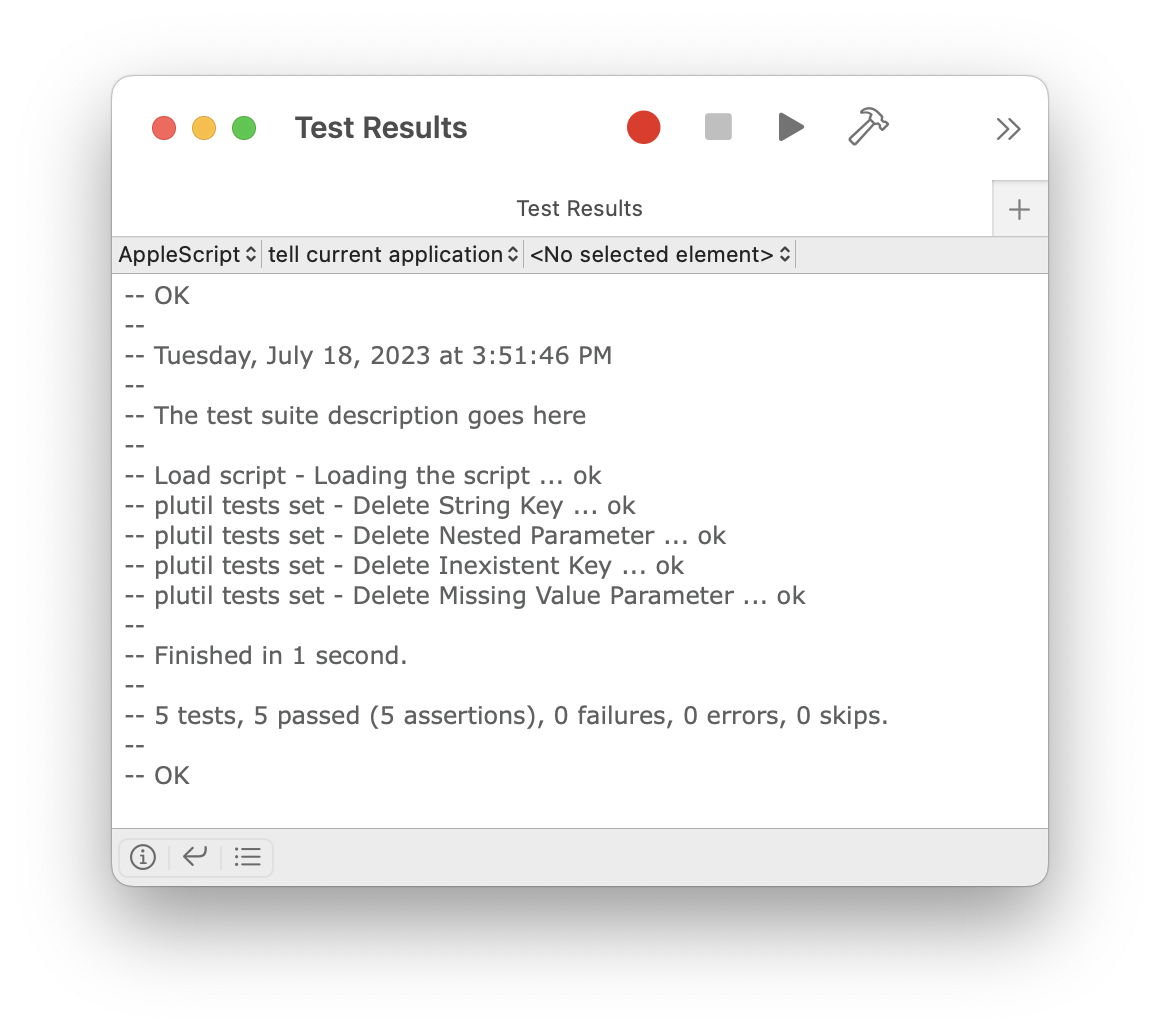
Conclusion: The Value of Unit Testing with ASUnit

ASUnit is a very well-written tool that greatly enhances the process of unit testing in AppleScript. Using ASUnit allowed me to write comprehensive unit tests for my AppleScript projects, ensuring that my scripts were functioning correctly and consistently. Additionally, ASUnit provided me with a separation of the tests from my actual scripts, making it easier to manage and maintain my codebase.


Wednesday, June 28, 2023

Choosing AppleScript package format for execution.


Choosing AppleScript package format for execution


Introduction

AppleScript is a powerful scripting language that can be used to automate tasks on macOS. However, before you can run an AppleScript, you need to package it in a way that makes it executable. There are several different ways to do this, and the best approach for you will depend on your specific needs.

In this blog post, I will discuss the different ways to package an AppleScript file, and I will provide some guidance on how to choose the right approach for your needs. I will also discuss the advantages and disadvantages of each approach, so that you can make an informed decision.

I have tested the following approaches on macOS Monterey, but they should also work with macOS Ventura.

Options

Option 1: Exporting an AppleScript as an Application

In this approach, we simply do a File > Export of the script and set one option:

Change the file format to Application
This works fine for simple cases like in this example, I only have a "say 1" command in the body of the script.

Features

  • Most straightforward approach.
  • The script is portable that it can be shared with other Macs.
  • The app can be triggered from the spotlight.
  • Small footprint. The generated file above is only 175KB.

Disadvantages

  • Updating the script would require the source file to be re-exported.
  • Changing the icon is not a straightforward approach. I use a paid app Image2icon app to try to change its icon and it didn't work.
  • There is a small overhead in the launch time because it is an app.

Option 2: Creating an AppleScript Application using Automator

In this approach, we will be using Automator, which comes with macOS. We will be creating an Automator app with a small template script that can be modified to run any script on the host computer.

Step 1: Launch Automator and choose Application
Step 2: Filter the actions to find the Run AppleScript
Step 3: Drag and drop the Run AppleScript action to the right pane
Step 4: Update the code with the following. Take note of the script path to point to the correct script. Compile the code by clicking on the hammer icon to make sure there are no typos.
Step 5: Set the name of the file, choose the location, and save the document.

Features

  • The script is available across apps.

Advantages

  • Easy to change the application icon using the Image2icon app.
  • Easier to change the implementation. Just change the referenced script file and the app would reflect the changes on re-run.

Disadvantages

  • The application file is larger at around 3.3MB, and even slightly bigger at 4.1MB after changing its icon.
  • More steps to create the app but nothing that can't be automated.
  • There is a small overhead in the launch time because it is an app.

Option 3: Running the Script in Script Editor or Script Debugger

In this approach, we will load the script file on the default AppleScript editor. It can be a 3rd party paid app Script Debugger if that is available to you.

Step 1: Open the Script Using Spotlight.

Step 2: Run the file from the editor by clicking the play button or pressing Command + R, or by clicking the menu item Run from the menu Script.

Features

  • The script is very easy to trigger
  • The script is available across apps.

Disadvantages

  • The script is prone to accidental modification because we are opening the file with a code editor.
  • Launches a separate app just to launch a script.

Option 4: Running the Script from the Script Menu

Step 1: Enable the Script Menu in the Script Editor
You should be able to see the Script Menu appear in the menu bar.


Step 2.a: If you want the script to be available only to a specific app, focus on that app then navigate to that application scripts folder by clicking the first menu item, the Open Safari Scripts Folder on the example below.
Step 2.b: If you want the script to be available regardless of which app is focused, navigate to the user scripts folder by clicking the second menu item, the Open User Scripts Folder.


Step 3: Now copy your script into the folder in Step 2 and it should now appear in the drop-down. If you chose to copy the script into the app scripts folder, the script will only be visible when that app is focused, otherwise, it will always be visible if you choose to copy it into the User Cripts Folder or the Computer Scripts Folder. Choose Computer Scripts Folder if you want your script to be accessible to other users of your computer as well.

.

Features

  • The script can be triggered from the menu bar.
  • The script can be available across apps or specific only to the focused app.
Disadvantages
  • The script is a copy and would need extra steps to properly manage via version control.

Option 5: Running the Script from a Keyboard Maestro Macro

Features

  • The script code can also be triggered via the Script Menu.
  • Thes script can be triggered via command line.
  • The script can be triggered via URL.
  • The script can use the blanket of the Keyboard Maestro accessibility permission.
  • The script is very convenient to trigger if you have a Stream Deck.
  • The script will run faster as compared to an app.
Disadvantages
  • The script is not easy to version control
  • The script requires the use of a paid app Keyboard Maestro.
  • The script is not very easy to trigger
  • Requires another form of trigger like Stream Deck hardware or via a hotkey.

Option 6: Running the Script in the command line using osascript

Step 1: Open Terminal
Step 2: Run the command: osascript <path-to-your-script>
Step 3: Alternatively, you can make your script executable by updating the header of your script.

Then run the file like this:
Or by adding a header

Then make the file executable by running the command
Then run the file from its directory with:

Advantages

  • Easy to use when working in the command line.

Disadvantages

  • Requires the use of a Terminal app.
  • Might be too technical to use for regular folks.

In Summary

Use Case Automator Application Keyboard Maestro Macro Script Editor Application Script Menu Script Editor Command Line
Script Icon
App-Specific
Available System Wide
Build script (Makefile)
Git Version Control

Conclusion

I usually only consider the 3 options for my automation which are the App via Automator, Keyboard Maestro Macro, and Script Menu, and rarely via command line. To choose the best option, I would just ask these few questions.
  • Do we strongly feel the need to do version control for the script? If yes, use Application.
  • Do we need the script to be available only to the current app? If yes, then use Keyboard Maestro Macro along with Script Menu.
  • Do we need the script as part of the build process? If yes, then use the command line option.

Using ASUnit Testing Framework

Introduction to ASUnit and AppleScript In today's blog, I wanted to share my experience using ASUnit to write unit tests for AppleScript...